Today on the fifth attempt, I finally have a good loaf of
bread.
In the 1970s as a new bride I made my bread and rolls from
scratch using the wonderful recipes my mother and her mother had perfected. As
life became busier with a growing family and part-time jobs, I shopped for our
favorite breads. My mother eventually purchased a new kitchen appliance called
a breadmaker. She then happily supplied us with an abundance of fresh breads.
 |
| rosylittlethings.typepad.com |
I am always behind the new trends, even if convenience is involved, so I did not get my own breadmaker. Also I did not want the temptation of delicious calories. Today, however, much has changed about my lifestyle. I need to save money and work on self-control. I cook mainly for myself and in small amounts. In fact, among my many Pinterest boards, my recipes are categorized and pinned under "Cooking? As Needed."
 |
www.thriftyandthriving.com |
Now the convenient, multi-tasking breadmaker with its wide array of healthful recipes and functions has become appealing. With inspiration from food savvy friends and fortified with Amazon reward points and a Prime account for free shipping, I became a breadmaker owner with dreams of granola breads and jams.
 |
| Cuisinart CBK-100 2-Pound Programmable Breadmaker |
Why then were there so many initial failures with such a marvelous toy?
Admittedly I am not the best of bakers because I am an
intuitive cook. You know what I mean. Whatever is in the pantry becomes a yummy
creation. We enjoy just reading menus to see all the fabulous taste
combinations. We remember every savory taste to recreate for ourselves. We are
really good cooks...just ones who have an above-average number of baking
disasters.
Good bakers do not guess. They obediently follow the
measurements and process steps. No pinch here and there: baking is like being
in chemistry lab.
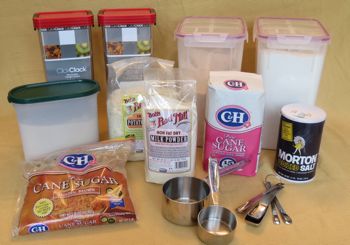
To begin the great experiment, I read the breadmaker's
operational manual and then all the recipes. This machine could do remarkable
things! I then went shopping for all the common ingredients in the various
recipes, plus extras for tasty-sounding varieties of oaty breads. I gathered
everything in a storage bin for the pantry so that future baking would be
convenient.
 |
| You Must Read: Six Bread Machine Secrets for Beginners |
Chemistry
Experiment # 1: Whole Grain Whole Wheat Bread
Result: grainy bowling ball; VERY loud thudding sound when
hitting bottom of trash can
What I Learned for Next Time:
1. As a beginner, do not think this a magic machine. Start
simple.
2. Be sure to have buckwheat flour, not buckwheat cereal (good
grief!)
3. Measure whole wheat flour carefully.
4. Be sure the dough is not too dry.
5. Try the smaller size loaf.
Chemistry
Experiment # 2: Granola Bread
Result: explosion in the breadmaker, burning and smoking,
loud thudding sound when hitting bottom of trash can
What I Learned for Next Time:
1. AGAIN, start simple.
2. Be sure liquid temperatures are correct.
3. Check to see that the dough is NOT TOO DRY.
4. AGAIN, try the smaller size loaf.
Chemistry
Experiment # 3: Seven Grain Bread (from a mix)
Result: AGAIN, an explosion in the breadmaker, burning and
smoking, loud groaning sound from my daughter when I yelled, “Catch this!”
What I Learned for Next Time:
1. Be sure liquid temperatures are correct.
2. Check to see that the dough is NOT TOO DRY.
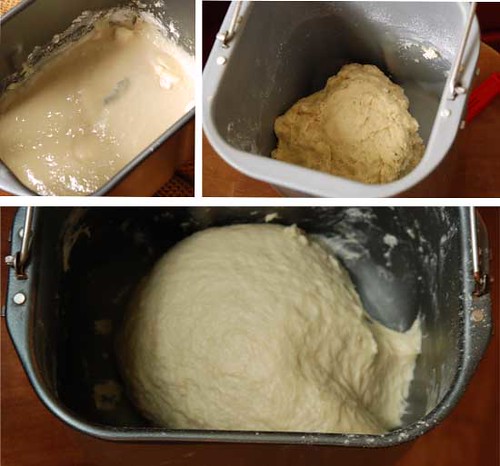
3. Remember that if you forget the kneading paddle and try
to put it in while mixing the dough, you will not get a good fit, will have a
terrible loud kneading sound, and eventually have the paddle in the middle of
the bread.
Chemistry
Experiment # 4: Beer Bread
(That was the only recipe that I could make from the ingredients I had not yet wasted. Beer
was in the refrigerator.)
Result: AGAIN, an explosion in the breadmaker, burning and
smoking, extremely ugly and dense lop-sided ball
What I Learned for Next Time:
1. Check to see that the dough is NOT TOO DRY.
2. AGAIN, try the smaller size loaf.
3. Do not waste good beer.
Chemistry
Experiment # 5: Beer Bread
(AGAIN,
Result: Perfect and Delicious!
What I Did to Remember for Next Time:
1. Read the book again with all the disasters in mind.
2. The simple recipe works for a beginner.
3. The smaller loaf works better.
4. Buy cheaper beer for making bread.
5. Sift the flour and then measure accurately.
6. Use Pam so the dough will not stick to the mixing
container.
7. Open the lid when the appropriate buzzer
sounds so that I can reshape the loaf and remove the mixing paddle.
8. USE SELF-CONTROL because this recipe is
delicious!BEER BREAD RECIPE
Ingredients for a medium 1.5 lb loaf:
1/2 cup water
1/2 cup beer
1 tsp salt
1 tbsp granulated sugar
3 cups bread flour
2 tsp yeast, active dry, instant or bread machine
Place all ingredients, in the order listed, in the bread pan fitted with the kneading paddle. Secure the bread pan. Select the Basic/White program. Press loaf size and crust color selections. Press Start to mix, knead, rise, and bake. If desired, when paddle signal sounds remove dough and kneading paddle, reshape dough, and replace in bread pan. When the cycle is complete, remove the bread pan from the machine and transfer bread to a wire rack to cool completely before slicing.