We here at Little Town thank you for your enthusiastic cheers for our rebuilding. Many have asked for a step-by-step tutorial to demonstrate how our easy maintenance village can showcase a storybook land.
The planning commission gladly put together a tutorial about what has worked. This plan can be as simple or advanced as you wish...yet really fun and easy no matter the stage.
Although not compensated for any item by sponsors, Little Town Mayor shares what has been convenient and successful. Some items are new, but most items are from her craft and housewares stash:
Building (I like the size and quality of Plow and Hearth, but more expensive and less expensive are easily available. The size will determine the container size.)
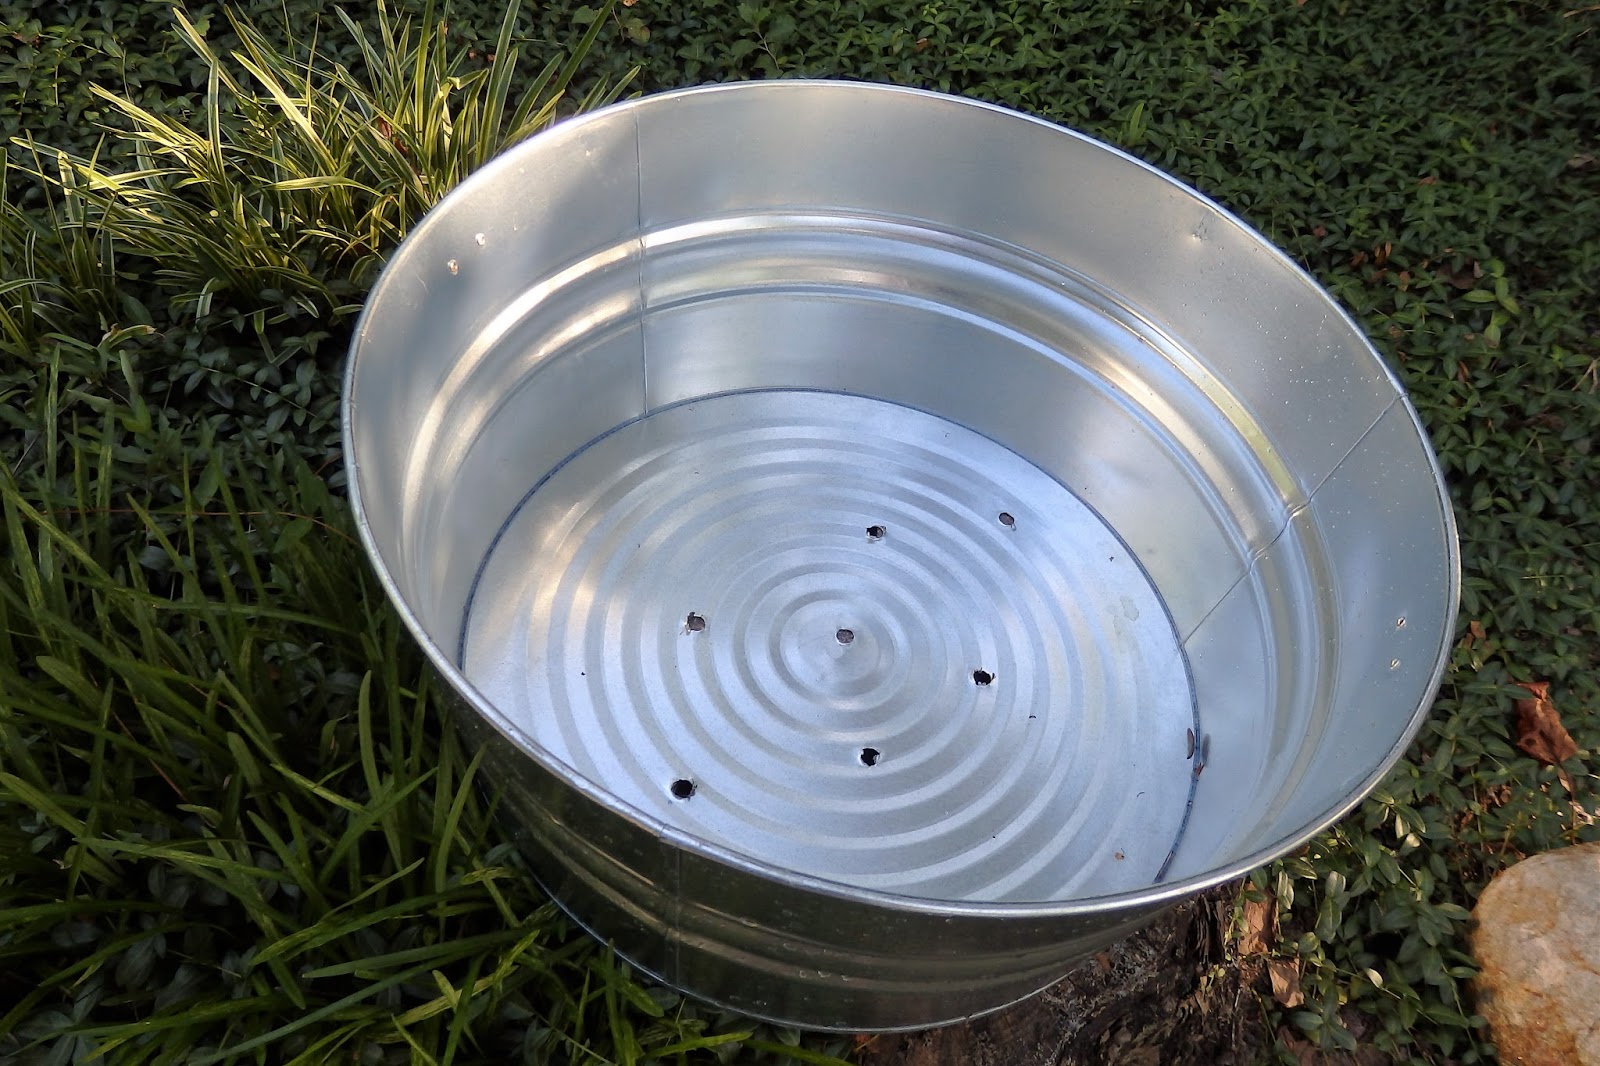
- Container (I like this one.)
- Small cement blocks to place under container for drainage (about $1 each)
- Large bag of potting soil (I like the moisture enhanced versions.)
- Small creeping plants that survive your climate/seasons
- Stones and optional fish tank gravel
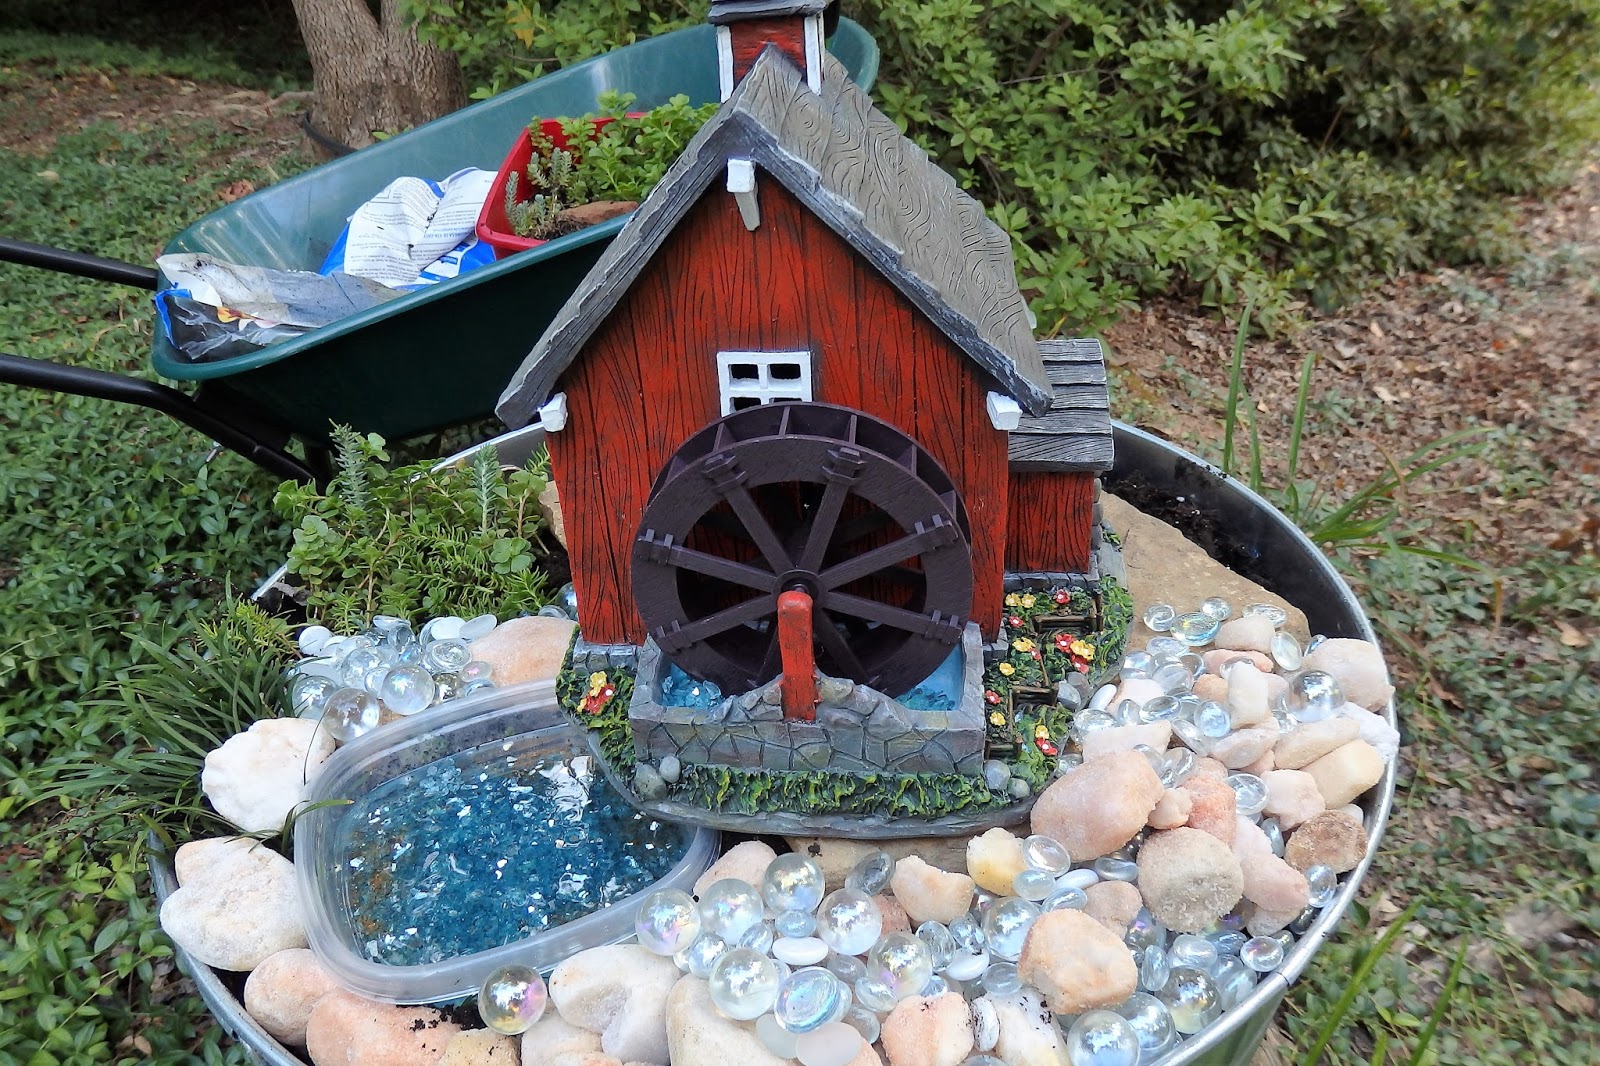
For the faux water in this mill version: plastic container (sandwich size); flower arranging "faux water" kit; flower arranging gems, glitter, gravel
STEP ONE: Drill holes in the container.
OPTIONAL: Make faux water with the florist-arranging kit found in your craft store. This process requires that you make the item many days in advance to allow for drying.
STEP TWO: Determine your location according to plant requirements. Place cement blocks, and balance the container on top.
STEP THREE: Gather your plants and soil. I had nurtured my plants since
this incident.
STEP FOUR: If there are significant plant roots and soil, fill the container three-quarters full, and arrange plants. Otherwise fill with an appropriate amount of soil - remembering that all will settle when watered later. Place a flagstone for the base of your building. Arrange according to your vision. Fill with plants, stone, gravel, sand, etc. Water carefully. Enjoy!
OPTIONAL for this Mill Design: Here are the visual steps for placement of plants and décor to create a stream effect for the mill.
Here is the new mill located "up the hill" from the farm at Little Town.
Thanks for visiting, Little Town Mayor


 We here at Little Town thank you for your enthusiastic cheers for our rebuilding. Many have asked for a step-by-step tutorial to demonstrate how our easy maintenance village can showcase a storybook land.