Friday, February 28, 2014

Making a Grieving House a Home Again #2

*This post accounts for my personal process. I do not know the grief of divorce, abuse, grave (physical, emotional, and mental) illness, or extreme poverty. I can no way speak about these and other forms of your grief. Only Death has visited me personally, and many times from a very young age until the present - father, mother, dear aunts and uncles, in-law parents, grandparents, in-law grandparent, godparent, close cousins and friends...and now husband.

*First, realize that everyone's grief has a different timeline. Do not rush the healing  process: You will know when you are ready to rebuild segments of your life more than just the everyday survival issues.


Secondly, prioritize necessities with dreams shared with the deceased individual. For us that was the following:
  1. Time with God and our growing family
  2. The integrity of the structure of the house
  3. The enjoyment of tending our yard (slideshow here)
  4. Travel, travel, travel and more travel. (Pinterest boards)
As you can see, beyond home improvements based on the sound preservation of our house, home decor was left to a minor role as DIY projects (exception being new tile for bathrooms and kitchen, along with a nice walk-in tiled shower). I have no complaints because this list was OUR list, and we were content with a shared life of household choices and extra money for adventurous #4 (travel, travel, travel and more travel).

What is my list today? Exactly the same! Those items are completely me, and I will keep them as long as I can based upon health and finances....so

Thirdly, evaluate the financial and physical/mental endurance of keeping that list compared to adapting and/or purging items.

I have been extremely blessed to keep my list if I live frugally. My age factored in causes me to push up strenuous travel adventures and house and garden DIY projects to as soon as possible in the next ten years. Controlling finances is a must in all areas. Selling off property may become an important  issue in twenty years; however, I do have long term care insurance that will allow me to stay in my home as long as I can. (Have you considered this kind of planning?) Staying here for another twenty-plus years preserving the integrity of a house means fashioning a home that I love. In fact, who knows what the typical HGTV house-seeking family will find to complain about by then? With these life parameters, I was comforted so that...

Maybe now, I can try to determine how to make this grieving house a home again. Here is how I finally began:


In the last post, I said that I discovered Home Stories A to Z and a post called "How to Decorate for the DIYer.

This process is the one that worked for me: "Categorize, Rearrange, Purge my Entire Home; Focus on Each Room as a DIY Project." 


This method comes from FieldstoneHillDesign.com,
Darlene Weir, owner and principal designer for Fieldstone Hill Design

Here is Darlene Weir's great advice: "Take inventory and focus on one room at a time, dream the possibilities, and then take action." 

My next post will show how I took this advice and will show my thought process put into action.

Thursday, February 27, 2014

Making a Grieving House a Home Again


I have been living in this house for twenty years making it a home with my husband of close to thirty-nine years. We had been friends since high school, making that bond one of forty-five years. Although our personalities were quite different (he an ENTJ, me an INFJ), we shared the same strong family values and respect for predecessors, family, friends, and events making us who we were. Therefore, words to describe our house(s) would be cozy, welcoming, eclectic, and above all, nature-inspired - a combination of heirlooms, vintage finds, modern and traditional art, traditional furniture, and collections reflecting our personalities. We truly had a shared space; however, to tell the truth, these combinations sometimes seemed frustrating compared to new showcase houses. I loved my home but sometimes the decor mixture made its aging into its own mid-life and in need of repair and updating both expensive and confusing issues.

Almost two years ago, I lost my husband suddenly. That time seems like yesterday, but so much family living has gone on, in both grief and chaos. The great good is that he was a great man with preparations for the future. And one of those preparations was his lifelong encouragement for me to grow independent and brave - some vital lessons left out of my 1950s and 1960s upbringing. So now, here I stand independent and brave trying to figure out how to make a grieving house a home again.

I am still very confused about how that can be done on each individual's personal level, but as an INFJ more goes on in the inside of me than the outside. Researching and more researching, meditating and more meditating, are not problems for me. Action is.

Where do I begin for the most cost-effective approach since I am a DIY kind of girl? My strength: I taught high school English, so I know how to research. This type of research would definitely not be academic, so I went to everybody's favorite visual journeling - Pinterest. This process took awhile as you can see from my Pinterest boards, but again I know that researching takes much reading, generalizing, categorizing, rearranging, purging, and focus to come to the point of discovery. Finally all came together for me.


I discovered Beth of Home Stories A to Z. She had put together a series with several guest decorators and bloggers called "How to Decorate for the DIYer". In the next post I will show what helped me to take action at home.

Saturday, February 8, 2014

Misadventures at the Bakery

Today on the fifth attempt, I finally have a good loaf of bread.

In the 1970s as a new bride I made my bread and rolls from scratch using the wonderful recipes my mother and her mother had perfected. As life became busier with a growing family and part-time jobs, I shopped for our favorite breads. My mother eventually purchased a new kitchen appliance called a breadmaker. She then happily supplied us with an abundance of fresh breads.

One of my most vivid and fondest memories is my mom making homemade bread . No bread machine. The good old fashioned way.  I loved when I got to "punch" it down.
rosylittlethings.typepad.com

I am always behind the new trends, even if convenience is involved, so I did not get my own breadmaker. Also I did not want the temptation of delicious calories. Today, however, much has changed about my lifestyle. I need to save money and work on self-control. I cook mainly for myself and in small amounts. In fact, among my many Pinterest boards, my recipes are categorized and pinned under "Cooking? As Needed."

www.thriftyandthriving.com


Now the convenient, multi-tasking breadmaker with its wide array of healthful recipes and functions has become appealing. With inspiration from food savvy friends and fortified with Amazon reward points and a Prime account for free shipping, I became a breadmaker owner with dreams of granola breads and jams.

Cuisinart CBK-100 2-Pound Programmable Breadmaker

Why then were there so many initial failures with such a marvelous toy?

Admittedly I am not the best of bakers because I am an intuitive cook. You know what I mean. Whatever is in the pantry becomes a yummy creation. We enjoy just reading menus to see all the fabulous taste combinations. We remember every savory taste to recreate for ourselves. We are really good cooks...just ones who have an above-average number of baking disasters.

Good bakers do not guess. They obediently follow the measurements and process steps. No pinch here and there: baking is like being in chemistry lab.

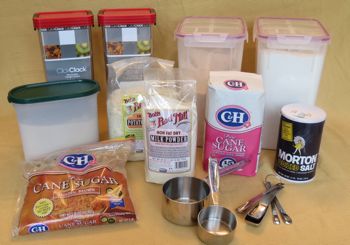
To begin the great experiment, I read the breadmaker's operational manual and then all the recipes. This machine could do remarkable things! I then went shopping for all the common ingredients in the various recipes, plus extras for tasty-sounding varieties of oaty breads. I gathered everything in a storage bin for the pantry so that future baking would be convenient.


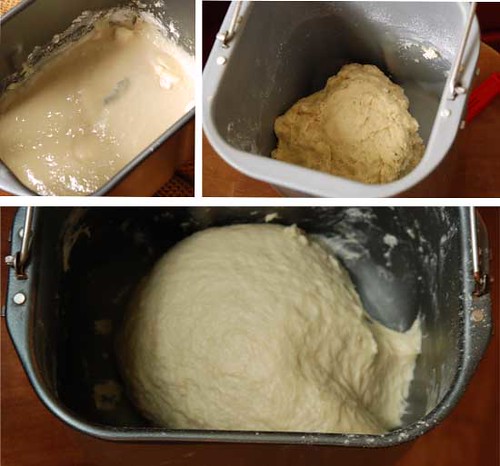
breadmachine-story-board_edited-1
You Must Read: Six Bread Machine Secrets for Beginners


Chemistry Experiment # 1: Whole Grain Whole Wheat Bread

Result: grainy bowling ball; VERY loud thudding sound when hitting bottom of trash can

What I Learned for Next Time:
1. As a beginner, do not think this a magic machine. Start simple.
2. Be sure to have buckwheat flour, not buckwheat cereal (good grief!)
3. Measure whole wheat flour carefully.
4. Be sure the dough is not too dry.
5. Try the smaller size loaf.


Chemistry Experiment # 2: Granola Bread

Result: explosion in the breadmaker, burning and smoking, loud thudding sound when hitting bottom of trash can

What I Learned for Next Time:
1. AGAIN, start simple.
2. Be sure liquid temperatures are correct.
3. Check to see that the dough is NOT TOO DRY.
4. AGAIN, try the smaller size loaf.


Chemistry Experiment # 3: Seven Grain Bread (from a mix)

Result: AGAIN, an explosion in the breadmaker, burning and smoking, loud groaning sound from my daughter when I yelled, “Catch this!”

What I Learned for Next Time:
1. Be sure liquid temperatures are correct.
2. Check to see that the dough is NOT TOO DRY.
3. Remember that if you forget the kneading paddle and try to put it in while mixing the dough, you will not get a good fit, will have a terrible loud kneading sound, and eventually have the paddle in the middle of the bread.


Chemistry Experiment # 4: Beer Bread 
(That was the only recipe that I could make from the ingredients I had not yet wasted. Beer was in the refrigerator.)

Result: AGAIN, an explosion in the breadmaker, burning and smoking, extremely ugly and dense lop-sided ball 

What I Learned for Next Time:
1. Check to see that the dough is NOT TOO DRY.
2. AGAIN, try the smaller size loaf. 
3. Do not waste good beer.


Chemistry Experiment # 5: Beer Bread 
(AGAIN, that was the only recipe that I could make from the ingredients I had not yet wasted. Beer was in the refrigerator.)

Result: Perfect and Delicious!

What I Did to Remember for Next Time:
1. Read the book again with all the disasters in mind.
2. The simple recipe works for a beginner.
3. The smaller loaf works better.
4. Buy cheaper beer for making bread.
5. Sift the flour and then measure accurately.
6. Use Pam so the dough will not stick to the mixing container.
7. Open the lid when the appropriate buzzer sounds so that I can reshape the loaf and remove the mixing paddle.
8.  USE SELF-CONTROL because this recipe is delicious!


BEER BREAD RECIPE

Ingredients for a medium 1.5 lb loaf:

1/2 cup water
1/2 cup beer
1 tsp salt
1 tbsp granulated sugar
3 cups bread flour
2 tsp yeast, active dry, instant or bread machine

Place all ingredients, in the order listed, in the bread pan fitted with the kneading paddle. Secure the bread pan. Select the Basic/White program. Press loaf size and crust color selections. Press Start to mix, knead, rise, and bake. If desired, when paddle signal sounds remove dough and kneading paddle, reshape dough, and replace in bread pan. When the cycle is complete, remove the bread pan from the machine and transfer bread to a wire rack to cool completely before slicing.

Monday, February 3, 2014

Mail Your Valentine Cards Soon


from the Mayor's collection of antique Valentine Cards


A History of Valentine Cards by Vivian Krug of Emotions Greeting Cards:
“Valentine greetings were popular as far back as the Middle Ages when lovers said or sang their Valentines. Written Valentines began to appear after 1400... In the early 1800's, Valentines began to be assembled in factories.  Early manufactured Valentines were black and white pictures painted by workers in a factory.  Fancy Valentines were made with real lace and ribbons, with paper lace introduced in the mid 1800's.  By the end of the 1800's, Valentines were being made entirely by machine.  In 1850, Esther Howland, an American printer and artist was among the first to publish and sell Valentines in the United States.   In the early 1900's a card company named Norcross became one of the first companies to manufacture Valentines.  With the exception of Christmas, Americans exchange more cards on Valentine's Day than any other time of year.”

Here are few of my Valentine projects from images of my antique Valentine collection. Pendants are at my shop here:


Pendants made from antique and vintage Valentine Cards at LittleTown.etsy.com


Like the postcard and stamp collage handbags, this series was made from scanned Valentine collages.
 
Valentines and Christmas Cards from the 1900s to 1920s


Sunday, February 2, 2014

The Mayor's Love for Postage Ephemera

The Mayor's Love for Letters and Stamps: A Project Gallery
My husband collected stamps while I collected vintage postcards, as well as family letters and autograph books. Since all items were of some value - monetary or nostalgic - I created my own collages first from some of these items and then scanned them for projects.

I still have that French love for decoupage (and that 1970s love affair with it), so most of my projects are "decoupages" from those scanned collages that I print on card stock from my computer. Remember that United States postage stamps are in the public domain if issued before December 31, 1978. You can also use original ephemera or scrapbook paper; however, the weight of these items may not survive the decoupage process well.

Here are a few of my projects with postage stamps.


Paper Mache Houses with Vintage Photos, Stamps, Postcards, and Pharmacy Labels


Vintage Stamps Made into a Collage for a Handbag


Antique Hawaiian Postcards with Stamps